CLICK HERE FOR FREE BLOGGER TEMPLATES, LINK BUTTONS AND MORE! »

Tuesday, November 30, 2010

Chocolate Chip Pudding Cookies


I've seen this chocolate chip cookie recipe floating around on the internet for awhile. It seemed to be calling my name every where I looked. Then I got an email from my sister with the same recipe! I think the universe was telling me that I really needed to try these cookies. My sister tried them first and her reviews were so good ( that she threw all her other chocolate chip cookie recipes away! As soon as I heard that, I stopped what I was doing and made these amazing little cookies.  The secret to them is that they have a package of vanilla pudding in them. It makes them soft and sweet and oh so delicious. You will love these! 


Chocolate Chip Pudding Cookies
adapted from Kraft Kitchens

Makes 3 dozen cookies

1 cup butter or margarine, softened
3/4 cup  packed brown sugar
1/4 cup granulated sugar
1 pkg.  (3.4 oz.) JELL-O Vanilla Flavor Instant Pudding
1 tsp. vanilla
2   eggs
1 tsp. baking soda
2-1/4 cups  flour
1 pkg. (12 oz.) semi-sweet chocolate chips
*optional 1/2 tsp salt, OR you can sprinkle sea salt on top of cookie dough balls.

Heat oven to 375°F. Beat butter, sugars, dry pudding mix and vanilla in large bowl with mixer until well blended. Add eggs and baking soda *(and salt if desired); mix well. Gradually beat in flour. Stir in chocolate. Drop teaspoonfuls of dough, 2 inches apart, onto baking sheets. Bake 7 to 9 min. or until golden brown. Cool 3 min. on baking sheets. Remove to wire racks. Cool completely.

*The recipe does not call for any salt. If you like that little saltiness to your chocolate chip cookies, just add a 1/2 tsp of salt to your dough. Or you can do what I love to do with all my chocolate chip cookies, sprinkle a little sea salt on top! 

**Also, feel free to switch up the pudding mixes to your liking. Try a butterscotch pudding with butterscotch chips. I think next time I might try a chocolate pudding mix!


Wednesday, November 24, 2010

Her Aunt Carolyn's Famous Casserole


This is one of Becoming Betty's favorite dishes, so much that she even posted it twice on her own blog. It was definitely worthy of a two blog post. :) My husband LOVED this dish. I don't really get much from him besides "I like it" or "It's good". If I get a "I love this!" Then I know it is for sure a keeper. It is a hearty, warm, delicious meal!

Her Aunt' Carolyn's Famous Casserole
recipe from Becoming Betty

1 lb. ground beef
1 onion, chopped
1 can tomato soup
1 can tomato sauce (15 oz.)
1 can corn, drained
1 T. chili powder
1 tsp. salt
8 oz. pasta cooked *You can use uncooked pasta, just add a little bit of water to the mix. It turned out fine, and I used maybe a half a can or so of water. Just make sure all the noodles are submerged into the liquid before cooking, to prevent any uncooked edges.


Brown beef and onion. Drain the extra fat.  Add the rest of ingredients and mix well.  Pour into a casserole dish and sprinkle with shredded cheese. Bake at 350 for 40 minutes.


Tuesday, November 23, 2010

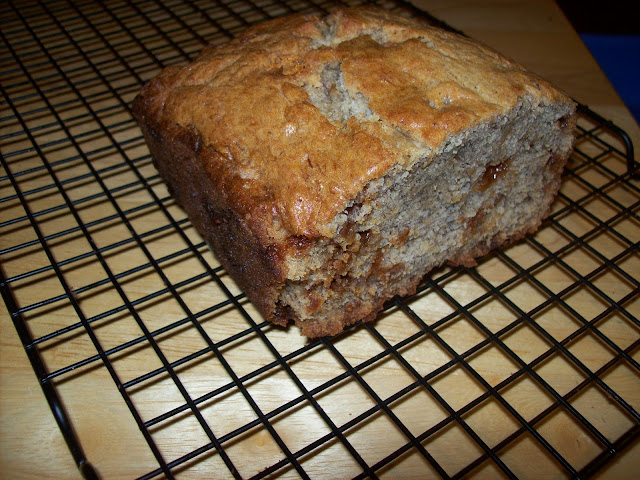
Butterscotch Banana Bread


I had a bunch of old bananas that I needed to get rid of. What better use of old bananas than banana bread. I wanted to make something a little different this time so I found this recipe on allrecipes.com. Butterscotch banana bread? I'll take it! I gave half to Brian's study group and they really liked it too. So if you are bored of just regular banana bread, then give this one a try. You won 't be disappointed. I think it could even use more butterscotch flavor, maybe next time I'll add a butterscotch pudding mix to the recipe!


Butterscotch Banana Bread
adapted from allrecipes.com via Kwarren


  • 2 cups all-purpose flour
  • 1 teaspoon baking powder
  • 1/2 teaspoon baking soda
  • 1/2 teaspoon salt
  • 3/4 teaspoon ground cinnamon
  • 1/2 teaspoon ground nutmeg
  • 1/2 cup butter
  • 3/4 cup white sugar
  • 1 large egg
  • 3 ripe bananas, mashed
  • 3/4 cup butterscotch chips
  • 1/2 cup chopped walnuts (optional)

  • Preheat an oven to 350 degrees. Grease loaf pan and set aside. Sift the flour, baking powder, baking soda, salt, cinnamon, and nutmeg together in a bowl. Set aside. Beat the butter and sugar with an electric mixer in a large bowl until light and fluffy. The mixture should be noticeably lighter in color. Beat in the egg, then stir in the mashed bananas. Pour in the flour mixture, mixing until just incorporated. Fold in the butterscotch chips and walnuts *optional; mixing just enough to evenly combine. Pour the batter evenly into the loaf pan. Bake in the preheated oven until a toothpick inserted into the center comes out clean, 60 minutes, but watch closely.  Cool in the pans for 10 minutes before removing to cool completely on a wire rack.


Sunday, November 21, 2010

Creamy Corn Chowder


This soup has quickly climbed to the top of my favorite soup list. It is so, so simple and delicious every time. I have made it a time or two, or a hundred, so you can trust me on this one. It will warm you from your toes to your top and keep you feeling nice and full without being too heavy. I love its creamy, smoky flavor. Enjoy!


Creamy Corn Chowder
Recipe by Our Best Bites

2 Tbsp. butter
1/4 c. all-purpose flour
1 c. water
2 1/2 c. milk
2 regular-sized chicken bouillon cubes, 1 Knorr chicken bouillon cube, or 2 tsp. chicken base
1/2 lb. bacon (optional, but I highly recommend it. If you don't use bacon, use a few shakes of smoked paprika, to give it the smoky flavor. Mmmmm!)
1 small onion, minced
2 red potatoes, diced into small cubes
2-3 cloves garlic, minced
1 can corn, drained or about 1 1/2 C frozen fresh corn
Salt and pepper to taste 
A few dashes of hot sauce (like Tabasco or Cholula)

Fry bacon until crisp. In the meantime, melt butter over low heat in a soup pot. When melted, add flour to make a roux and whisk until it comes together in a little ball. Add water and whisk until completely combined and there are no lumps. Add milk and chicken base or bouillon and bring to a simmer. Add potatoes, onions, and garlic, and simmer (but don't boil!), stirring very frequently, for about 20 minutes or until potatoes are tender. Add crumbled bacon and corn and heat through. Add a few drops of hot sauce and then salt to taste. The reason why I don't have an exact measurement is that while the soup REALLY needs salt, bacon also really differs in its saltiness, so it can be super easy to make this soup waaaaay too salty. Start with about 1/4 tsp., give it a few minutes, and then add more if you need it. Ladle into bowls and sprinkle with extra bacon and/or cheese if you want.

Tuesday, November 16, 2010

German Pancakes


I love breakfast. My favorite breakfasts usually involve syrup...pancakes, waffles, french toasts etc. I'm not sure these qualify as a "pancake", but they are called pancakes, and that works for me. They are just plain delicious. I love pulling them out of the oven all big and puffy. 


My favorite are the browned edges, drizzled with syrup. In this case, orange syrup. It was pretty delicious. Now go and make some German pancakes for dinner or breakfast!

German Pancakes
adapted from Mandy's Recipe Box


6 eggs
3/4 c milk
3/4 c flour
½ tsp salt
1 tsp sugar
6 T butter (or 3 T each pan if doing two circle pans. I usually don't use the full amount)

Melt butter and pour into a 9x13, or two circle cake pans. Spread butter out evenly on bottom. Mix rest of ingredients until fluffy. Pour batter onto butter. Bake @ 425 for 20 min.


*The picture above, the recipe has been halved.

Friday, November 12, 2010

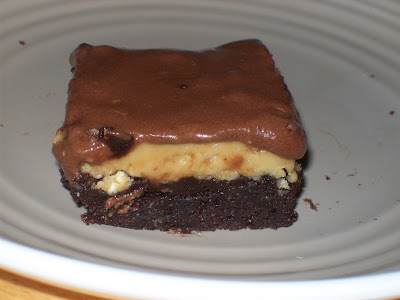
Triple Layer Peanut Butter Brownies


I'm just going to be honest with you now. You'll probably be seeing a lot of brownie recipes on this blog, and I'm not apologizing! Why? Because brownies, in all shapes and sizes, are my absolute favorite dessert ever, and I love it when someone comes up with a brilliant recipe idea that includes brownies. Just like this one from one of my favorite food bloggers, One Crazy Cookie. It knocked my socks off and I enjoyed every single bite....all by myself thank you. Okay I might have shared one or two with the family, but that's it! Thank goodness they were sick in bed, or I might have had to share more. :) They really were so yummy, and I kinda miss them. This is probably my favorite brownie recipe so far. Please try them, you'll be glad you did. 

Start with the ultimate brownie mix...
Bake em up according to box directions and let cool. (the recipe calls for a full box, but I was using a bag mix and didn't have enough to make a full pan, so I halved the recipe)
 Make up the second layer. Mix peanut butter, powdered sugar, rice cripies, and butter.
 Spread on top of the cooled brownies. 
 Make the third and final layer. Mix cocoa powder, powdered sugar, milk, vanilla and butter. 
 Pour over peanut butter layer and spread evenly.

 I refrigerated mine to help it set up and stored them in the fridge. They aged very well. They were like fudgy Reese's peanut butter cups! Delicious? I think so. 

Triple Layer Peanut Butter Brownies

Brownie Layer:
1 box brownie mix

Peanut Butter Layer:
1/2 cup butter, melted
2 cups powdered sugar
3/4 cup peanut butter
1 cup crusted crispy rice cereal

Frosting Layer:
1/2 cup butter, softened
3 cups powdered sugar
1/4 cup cocoa
1/3 cup milk
1 teaspoon vanilla

Prepare brownie mix according to directions. Bake and let cool. When brownies are cool make your peanut butter layer. Mix ingredients together until smooth and well blended. Spread over top of brownie layer. Then make your frosting layer. Mix all the ingredients until smooth. It may be a but runny but will firm up in the fridge.  Spread over top of peanut butter layer. Yum!

Tuesday, November 9, 2010

My Shepard's Pie


Shepard's Pie is so me. Meaning, I love meals that are complete meals all in one bite. You got your meat, starch, vegetables and dairy all in one bite! I guess that's why I love casseroles so much. Any time we do have a dish with separate sides, such as Thanksgiving Dinner, I always end up mixing the turkey, mashed potatoes, stuffing, and corn all on the fork at one time. I guess that's just how I roll. 

This recipe is just a little different from your traditional Shepard's Pie, but different in a very good way. I added a can of corn, because the more veggies the merrier in my opinion. The one can of tomato soup was leaving it a bit dry for my taste, so I added a can of cream of mushroom in addition to the tomato soup! It turned out even more flavorful and creamy than the traditional kind. It was SO SO yummy. I didn't even hear any complaints from the hubby when we had it not one, not two, but three nights in a row. :)

Start off with browning the meat and onions, drain the fat. Mix the beef, can of corn, can of green beans and a can of tomato soup. So easy! Throw in a greased casserole dish.

Next mash up 3 or 4 potatoes, however many potatoes you like, until creamy. Spread on top of the beef mixture.

Top with grated cheese. I'm using colby jack here, but cheddar would be yummy too.

Bake at 350 degrees til cheese is melted and casserole is bubblin. About 30 minutes.

Serve to a hungry family with a big appetite. This dish is hearty and perfect for a cool November night.

My Shepard's Pie
Cami Jacoway

1 lb. ground beef
1/2 medium to large onion
1 can corn, drained
1 can green beans, drained
1 can tomato soup
1 can cream of mushroom soup *I did not end up using the entire can.
4 medium potatoes *more or less depending on your preference
1 cup grated cheese

Begin by boiling your water for the potatoes. Peel the potatoes and chop in to quarters. Place in boiling water and cook until soft (about 20 minutes or so). 

Preheat oven to 350 degrees. While the potatoes are boiling, brown ground beef, and season with salt and pepper. Add onions to the ground beef while it is cooking, cook until onions are soft and meat is cooked. Drain extra fat. Pour beef and onion mixture into a large bowl and add the corn, green beans, tomato soup and cream of mushroom soup. Mix until incorporated. Pour mixture into a greased 9x13 dish and smooth out.

When potatoes are soft, drain and place in a bowl to mash. Add a dash of milk and beat potatoes until creamy. Adding more milk if necessary. Spread mashed potatoes onto the ground beef, soup mixture. Sprinkle with grated cheese and place in oven for about 30 minutes.

Sunday, November 7, 2010

Honey Glazed Garlic Chicken


My grandmother has celiac disease so she's always had to be careful with what she eats. Until recently it has been hard to find many recipes that are gluten free, now they are abundant! When grandma would come over to eat we would usually just prepare something separate than the rest of us were having, because it was hard to find something we all could have! Well, my family bought this gluten free cookbook "Gluten-Free Family Favorites" (available at Honeyville Farms retail locations) and they have been having a good time making recipes for grandma. I think grandma has enjoyed it too! This recipe came from that cookbook and the whole family enjoyed it! It really was DELICIOUS! 


Glazed Honey-Garlic Chicken
Joyce Schrock


1 T vegetable oil
1 clove garlic, minced
1/3 c. honey
1/3 c. gluten-free soy sauce (such as La Choy)
1/4 c. unsweetened pineapple juice
1/2 tsp white vinegar
1/2 c. ketchup
4 (4oz) skinless, boneless, chicken breasts *we used tenderloins


Preheat oven to 350 degrees. Combine oil, garlic and honey in a small bowl. Stir in soy sauce, pineapple juice, ketchup and vinegar. Grease a 6x10 inch baking dish. Arrange chicken in prepared dish. Pour sauce over chicken. Bake about 30 minutes. Serve over rice.

Friday, November 5, 2010

PW's Cinnamon Maple Rolls


I felt like I needed to redeem myself from my last PW post, so here are her famous cinnamon rolls! If you have heard of The Pioneer Woman, it is probably because of her cinnamon rolls. She raves about them, well everyone does! Of course I had to try them myself. It was my first time trying homemade cinnamon rolls, or any kind of rolls for that matter. It was a little bit of work, but lots of fun, and well worth it! The maple icing had to be my favorite part though. Who would have thunk maple icing for cinnamon rolls?! PW that's who....gosh she's great isn't she?

Mix the milk, oil, and sugar in a pan and scald the mixture. I had to look this up on the internet because I really wasn't sure how to tell when it is scalded. Basically when it gets hot enough that tiny bubbles will pop up around the sides and it gets a little frothy on the sides. DO NOT let it boil. Once it scalds then set it aside to cool for 45 min to 1 hour.


Add your yeast to the cooled milk mixture and let it sit a minute. (*I was using instant yeast so I added the yeast after the flour was incorporated.) Then add your flour and stir together. It should look something like this. Cover it and let it raise an hour.


After an hour you add 1 more cup of flour, baking soda, baking powder, and salt. Mix this into the dough. You could put it in the fridge overnight at this point, which I did, so I could roll them out the next morning and have them for breakfast fast! You may need to punch them down.

Now for the fun part! I had so much fun with rolling them out, and sprinkling the good stuff on them, that I totally forgot to take pictures. In fact, I didn't take another picture until they were out of the oven. (sounds familiar doesn't it? :) I'll try to do better!) So if you would like to see beautiful step by step pictures visit her website here, you won't regret it. 

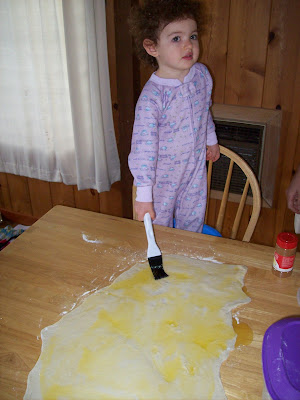
These next steps would be fun for the kids to help with. My 2 year old sure enjoyed it! 

Flour your surface and roll out half your dough. (It helps to form a rough rectangle before you roll it out). Drizzle your melted butter, sprinkle on your sugar and cinnamon. *I tried a little brown sugar as well as white sugar with mine, cause that's what my momma does! Roll it up lengthwise tightly and pinch the seam to seal it. Prepare your pans by pouring melted butter along the bottom. Cut the rolls about an inch thick and lay them in a pan, don't pack them in, leave a little room to raise and spread. Let them raise in the pan for about 20-30 minutes. Bake at 375 for 15-18 minutes!  

While they were baking I made my icing. Just add your powdered sugar, maple flavoring, milk, butter, and salt. Stir until nice and smooth, thick but pourable. When they rolls are done, I let them set a few minutes then poured the frosting over the warm rolls. Don't be afraid to frost generously!

I took these to a brunch with some friends and they were a hit. They were gone so fast and I got lots of "oohs and mmmms!" 


PW's Cinnamon Maple Rolls

Makes A LOT, I halved this recipe below and I got 2 full 9x13 pans. It was perfect.

DOUGH:
1 quart Whole Milk
1 cup Vegetable Oil
1 cup Sugar
2 packages Active Dry Yeast *I only had instant yeast, and it was fine, just add it AFTER the flour is incorporated, instead of adding it to the milk mixture.
8 cups (Plus 1 Cup Extra, Separated) All-purpose Flour
1 teaspoon (heaping) Baking Powder
1 teaspoon (scant) Baking Soda
1 Tablespoon (heaping) Salt

DOUGH TOPPINGS:
Plenty Of Melted Butter
2 cups Sugar
Generous Sprinkling Of Cinnamon
*I used a little bit of brown sugar as well, but it is up to you!

MAPLE FROSTING:
1 bag Powdered Sugar
2 teaspoons Maple Flavoring
½ cups Milk
¼ cups Melted Butter
¼ cups Brewed Coffee *I omitted this step, and it still turned out fantastic in my opinion
⅛ teaspoons Salt
  1. Mix the milk, vegetable oil and sugar in a pan. Scald the mixture (heat until just before the boiling point). Turn off heat and leave to cool 45 minutes to 1 hour. When the mixture is lukewarm to warm, but NOT hot, sprinkle in both packages of Active Dry Yeast. Let this sit for a minute. Then add 8 cups of all-purpose flour. Stir mixture together. Cover and let rise for at least an hour.
  2. After rising for at least an hour, add 1 more cup of flour, the baking powder, baking soda and salt. Stir mixture together. (At this point, you could cover the dough and put it in the fridge until you need it – overnight or even a day or two, if necessary. Just keep your eye on it and if it starts to overflow out of the pan, just punch it down).
  3. When ready to prepare rolls: Sprinkle rolling surface generously with flour. Take half the dough and form a rough rectangle. (if halving the recipe you don't need to half the dough, just roll out the whole thing). Then roll the dough thin, maintaining a general rectangular shape. Drizzle 1/2 to 1 cup melted butter over the dough. Now sprinkle 1 cup of sugar over the butter followed by a generous sprinkling of cinnamon.
  4. Now, starting at the opposite end, begin rolling the dough in a neat line toward you. Keep the roll relatively tight as you go. Next, pinch the seam of the roll to seal it.
  5. Spread 1 tablespoon of melted butter in a seven inch round foil cake or pie pan. Then begin cutting the rolls approximately ¾ to 1 inch thick and laying them in the buttered pans.
  6. Repeat this process with the other half of the dough, *unless you halved the recipe. Let the rolls rise for 20 to 30 minutes, then bake at 375 degrees until light golden brown, about 15 to 18 minutes.
  7. For the frosting, mix together all ingredients listed and stir well until smooth. It should be thick but pourable. Taste and adjust as needed. Generously drizzle over the warm rolls. Go crazy and don’t skimp on the frosting.